
MTV Music Generator allows you to record and edit samples from any audio CD, as well as from your soundcards, audio inputs and any WAV file. Please note that this feature is designed for your own personal use - distributing or publishing songs using samples taken from commercial CDs is illegal without permission from the copyright owner. Therefore, if you plan on trying to publish or copy your creations, we strongly advise that you only use the CD sampling feature to record copyright-free samples, such as those found on specially recorded sample CDs.
There are two ways to record samples in MTV Music Generator. You can use the CD player to record samples from audio CDs, and you can record within the riff editor, which takes input from the audio mixer.
Use this to record from your soundcard microphone and line inputs, as well as from other PC software.
The audio mixer can be brought up by pressing F10, or clicking on the audio mixer icon on the icon bar.
This will list all the audio inputs on your PC. You can alter the volume of these, as well as selecting which device is the input device (which will be recorded from).
Click on the main CD player section icon. You will now be prompted to choose 'No video' or 'Generate video'. If you want to record samples from the CD, choose 'No video'. You will now see a CD function bar appear on your screen. Use this to choose a track, play, pause and stop the CD. Click the 'Record' button when you want to record, and then click 'stop' to finish recording. The recorded sample will be placed into your sample palette.

When you are in the riff editor, right click to get the menu up, and select 'Record from PC audio'. You will then see the sample editor screen. Click the red record icon when you are ready to record and then click the mouse again to stop recording. You can then edit the recorded sample using the sample editor (see below).
Firstly, start the audio source playing or get ready to sing with your microphone! As soon as you reach the point that you want to start sampling, click on the 'record' icon.
You will see the bottom counter start to increase, which shows you how much you have recorded. When you want to finish sampling, click on the 'stop' icon.
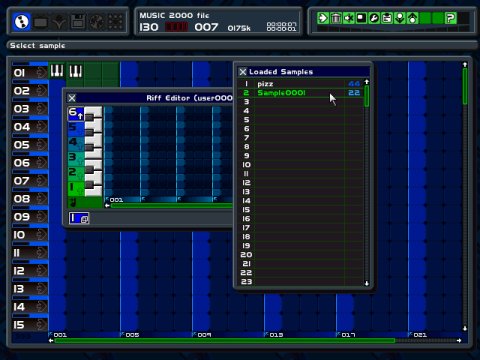
Go back into the song track screen, and create a new blank riff using the Riff Editor. Instead of going into the sample library, go into the sample palette via the menu. You will see at the bottom of the sample list a new sample called 'Sample 0001', which will contain the sound you just recorded.
You can use this just like a normal instrument sample, and place it in your riff. Everything that you can do with a normal sample, you can do with one you have created yourself.
The sample editor allows you to edit any sample, whether from MTV Music Generator or from an audio CD. To enter the sample editor, you need to be in the sample palette screen. Highlight the sample that you wish to edit, press the menu button and choose the 'Edit sample' option.
You will see a graphical representation of your sample.

Here you can edit your sample in a number of ways:
The three markers
There are three pairs of markers. The top pair represents where your current position in the sample is, and when you are moving this marker around, the hourglass icon on the top right will be highlighted.
The second pair of markers shows the start of the sample edit area and is represented by the left arrow icon. As you move this around, you will see parts of the sample turning into a black background.
The third pair of markers represents the end of the sample edit area. This is represented by the right arrow icon and, again, parts of the sample will have a black background as you move this around.
Sample editor icons
The first three icons are mentioned above.
The fourth icon represents the loop point.
The 'K'-shaped icon shows the size of your sample in bytes (i.e. how much memory it takes up)
The next icon tells you whereabouts in the sample the left of the screen is. This is useful to know if you're zooming in to a section within your sample.
The next icon tells you whereabouts in the sample the right of the screen is.
The final icon shows the size of the current editing zone (the area highlighted in pink and white).
Cutting, copying, trimming and pasting
In order to select an area within your sample, you need to move the start markers to the start and the end markers to the end of that area. The area will then have a pink and white background and the rest of the sample will have a black background. Copy the highlighted area by choosing the 'Copy' option from the menu. Paste the area you have just copied using the 'Paste copied area' option. The 'Cut' option works in a similar way except that it deletes the area you copy. Trimming is a very useful option, deleting areas with a black background to remove any silent or unwanted areas.
Zooming in / out
You can use the 'Zoom into area' and 'Zoom out' options to alter the magnification of the sample in order to concentrate on more detailed areas.
Note: There are some complicated parameters that we don't have room to fully explain here. More details on these can be found in sampling journals, or on the Internet.
All the effects listed below are accessible via the help menu.
Loop on: Toggle sample loop on/off once it has finished playing
Alter sample ADSR values: Change the note volume envelope
Comb filter: Cut out any unwanted frequencies
All-pass filter: Add delay and feedback to the sample
Reverb filter: Add reverb to the selected area
High / low pass filter: Allow just the high or low frequencies to be heard
Flange filter: Add a flange effect to the selected area
Phase filter: Add a phase effect to the selected area
Weird filter: Add a weird effect to the selected area
Bandpass filter: Isolate a band of frequencies from your sample
Reverse
This literally reverses the selected area, so it plays backwards. This can create some unique sounds!
Normalize
This alters the volume of the sample so that it will tie in with the other standard samples in MTV Music Generator. If your audio CD is quiet, or if you record a soft section of music, this is very useful for bringing the volume up.
Mixing samples
Combine two samples. Select the first area and choose the 'Copy' option. Then go to the second sample, select the required area, and choose 'Mix samples'. The two samples will be mixed together, and you will end up with one sample that contains both sounds. Keep repeating this process to add more and more sounds to one sample.
Optimizing the loaded sample list
This removes any sample from the list not being used in the song, for instance if you use a riff, and then delete it. The samples will still be stored in the list until you choose 'Optimize sample list'. This frees up any space taken up by unused samples.
Downgrading and upgrading samples
If your MTV Music Generator sample has been recorded at 44kHz, and you want to save memory, you can choose to downgrade the sample. The first time you downgrade, it will change to 22kHz, and then to 11kHz. Similarly, you can downgrade a 22kHz sample to 11kHz. Remember that there will be a drop in sample quality.
Saving your edited samples
Your edited samples are automatically saved with the song. Note that if you edit any default samples that come with MTV Music Generator, it won't save the new sample, just the changes you have made.